
Tips, Tools and Techniques
Are you new to cardmaking? New to stamping? Want to make your cards and scrapbook pages picture perfect? Well, I certainly can't guarantee that! But I can offer tips to help you achieve the look you are wanting and making your crafting easier.
Here are my top tips and tools you need:
First, you want to have a place to craft. Whether it is your kitchen table, dining room table, or a dedicated craft spot, you need something stable to stamp on! You'll need good light so that you can easily see what you are doing too! I use OTT lights on my craft table. You don't have the color changes you sometimes get with other lights. You can often find these lights on sale at different big box stores. You also want to have a protective cover on your table--stamping is messy! You can use a plastic tablecloth, plastic placemat, self-healing grid mat or whatever you want. Stampin' Up! sells grid paper that is wonderful to use. It comes two-sided (inches on one side and metric on the other) so when one side gets dirty, just flip it over! I love having measurements on my paper so that I can easily line up my stamps!

Next, you want a way to cut your paper. The Stampin' Up! paper trimmer is the best! I was cutting some cardstock for swaps and needed to cut huge amounts. I turned to my guillotine cutter to cut it out--Big Mistake! My cardstock was uneven and not correct to size. I had to trim all of it using my Stampin' Up! trimmer. I love that it also has a scorer so I can easily score my cardstock for my cards. And if you get some ragged edges, use an emery board or a nail block (I get the little ones from Sally's) to clean up those edges!

When making cards, I always make at least two of every card. That way I have one to send and another for me to show. I also take a photograph of every card so I have that for my records and I can keep track of what I have sent and to whom.
I always recommend doing your stamping first on any project! That way if you mess up, you can just flip the cardstock over and stamp again or grab another piece of paper. Want perfect placement of your stamping? Stamping Up! sells two different products that aid in that! The Stamp-a-ma-jig works wonderfully (especially with wood-mounted stamps) but is a little more work. You stamp on the imaging sheet and then place that over the paper where you want to stamp. Carefully remove the imaging sheet but keep the stamp-a-ma-jig in place and put your stamp against that to create the same image with perfect placement.

Stampin' Up! has also come out with a stamping platform (the Stamparatus) which will be available in the upcoming new annual catalog. This will sell for $49 and has 2 different reversible plates so you actually have 4 stamp plates to use. This works wonderfully with clear-mount and photopolymer stamps.

You'll want to choose some stamps to use. There are 3 types of stamps sold by Stampin' Up!
Wood-mounted stamps are the ones you are probably most used to seeing. These are red rubber stamps mounted on wood blocks. Clear-mount stamps are red rubber stamps that mount onto clear blocks (or the Stamparatus). Photopolymer stamps are totally clear stamps. Which stamps you choose is totally up to you but some stamp sets only come in photopolymer. I now prefer photopolymer for their ease in placement since you can see through them. They will stain but that won't affect how they stamp. You can minimize staining by first stamping in either Versamark ink or a very pale ink (like sahara sand or blushing bride) and then cleaning off.
Next, you'll want a way to color those stamps. We have a wide selection of dye inks, two archival inks, and markers that you can use to color. The Stampin' Write markers match all our color collections. Occasionally you can purchase separate markers (or in groups of 2 or 3) in one of the specialty catalogs. Otherwise, you can purchase the entire collection or each collection color. The In-Color markers come in separate sets too. You can color your stamps (red rubber ones work best) with your markers so you can stamp with multiple colors at once. Just color them, huff on the stamp (blow on it to re-activate the ink) and then stamp.


Whenever you purchase an ink pad, I recommend that you also purchase the re-inkers! That way you will be able to use your stamp pads forever! (And those re-inkers can be used for other techniques--baby wipe technique, shaving cream technique, water coloring and more!).
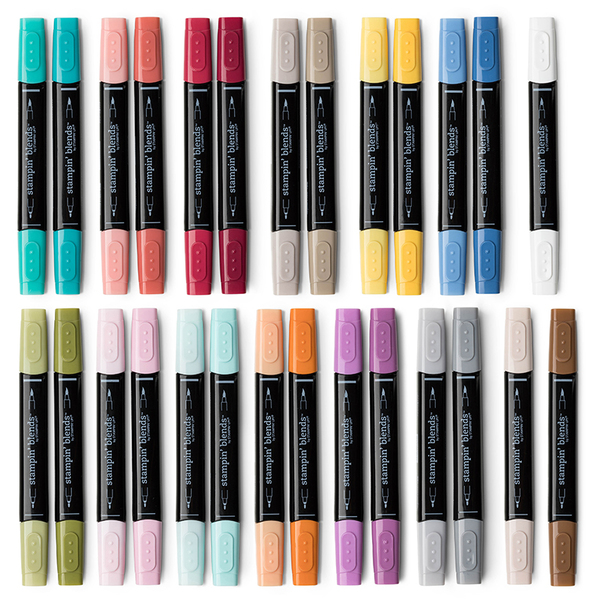
We also sell the Stampin' Blends, which are alcohol markers in our current colors. You'll want to stamp your image using a dye ink (any of our colors or Memento Tuxedo Black), let dry and then you can color in any of the stamped images. We have some great Designer Specialty paper that you can color in. Coloring is so relaxing for me! The Stampin' Blends come in a complete set, or you can purchase each color family (a light and a dark color) separately. You will be able to purchase these alcohol markers at the end of May. They are so popular that Stampin' Up! has currently turned off ordering for them so that they can build up some stock before the new catalog comes out.
So now you've done some stamping, you'll need to clean your stamps. You can sometimes use baby wipes, but they will often leave fibers on your stamps or won't clean them completely. I highly recommend our Stampin' Scrub and the Stampin' Mist to clean your stamps. The scrub comes with two sides--one for you to spray the mist on (see the raindrop on it) and then the other side has a little sun on it so you can dry off your stamps there.


FYI: you don't have to use the Stampin' Mist full strength. We also sell a refill so you can refill your small spritzer but you can dilute the Stampin' Mist and it will stick work well and save you some money.
Okay, now you have stamped some images, cleaned off your stamps, and cut your cardstock. Now it's time to put your project together. You'll need adhesives. We sell snail adhesive, Fast Fuse, Multipurpose glue, Fine-tip glue, Tear & Tape, dimensionals (mini and regular size) and glue dots. Each of those is used for different purposes and you'll have to decide which works best for you. I prefer Fast Fuse (super in humid climates) for putting my cards together but it does hold fast and you'll not be able to move it around at all. The Snail works well to hold cards and has a little give so you can adjust your paper if necessary. A lot of people use the Multipurpose liquid glue for putting their card layers together too. The Fine Tip glue is great for those small areas you want to glue down (and it also works like crystal effects if you want to make an area glossy--just remember it takes a long time to dry). The Tear & Tape works particularly well on projects like boxes where you want to hold pieces together. It is a much stronger adhesive. I use glue dots and dimensionals to attach diecuts. We also sell Multipurpose adhesive sheets that I use by attaching cardstock to the entire sheet and then run that paper through my Big Shot for diecuts. This is especially great for those detailed diecuts that would be difficult to glue down.
There are lots of tools that are nice to have but not necessary for basic cardmaking: A Big Shot for dry embossing and for cutting out dies; a heat tool to use for embossing; Dies; Embossing folders. Paper Snips (Stampin' Up!'s scissors are the BEST!) for trimming anything or for fussy-cutting out images to add to your cards or scrapbook pages. The Bone Folder makes it easier to get crisp folds. There is the Envelope Punch Board for making envelopes of any size and the Simply Scored which helps you score and make all kinds of projects.
So to summarize what you need to make cards: Cardstock (Stampin' Up!'s is the best), a trimmer, adhesive, stamps, coloring tools (inks or markers), scissors and a way to clean your stamps. And if you plan to mail out your cards, you'll need envelopes. You can find all sorts of envelopes all over but I truly think Stampin' Up!'s are the best, especially if you plan to stamp on the outside (dresses up the envelope). And make sure you cover your table or desk so you don't make a mess!
Nice to haves: Bone folder, Big Shot, Heat Tool, Simply Scored, Envelope Punch Board, Dies, and Embossing Folders, Stamparatus, Stamp-a-ma-jig, Grid Paper
Final Tip: Keep a list of what stamps you own so that you don't buy the same ones (ask me how I know to do that!). You can keep a list in a notebook, on your computer (make a backup in case your computer crashes--that's happened to me before) or use an app. I use Evernote to keep track of all my craft supplies -- it works on my computer, tablet and my phone. I input everything on my computer and it automatically updates my phone/tablet. This works wonderfully!